「platformIO」基于 stm32 标准外设库的工程模板
本教程默认用户已经安装好 vscode 和 platformIO !!!
1.下载官方标准外设库
进入 ST 官网的嵌入式软件板块 ,根据自身板子型号选择,有F0-F4多种型号。
之后根据提示选择下载即可,如果没有意外的话,应该会获得一个类似 en.stsw-stm32065_v1-9-0.zip(这是 F4 的标准库) 的压缩包。
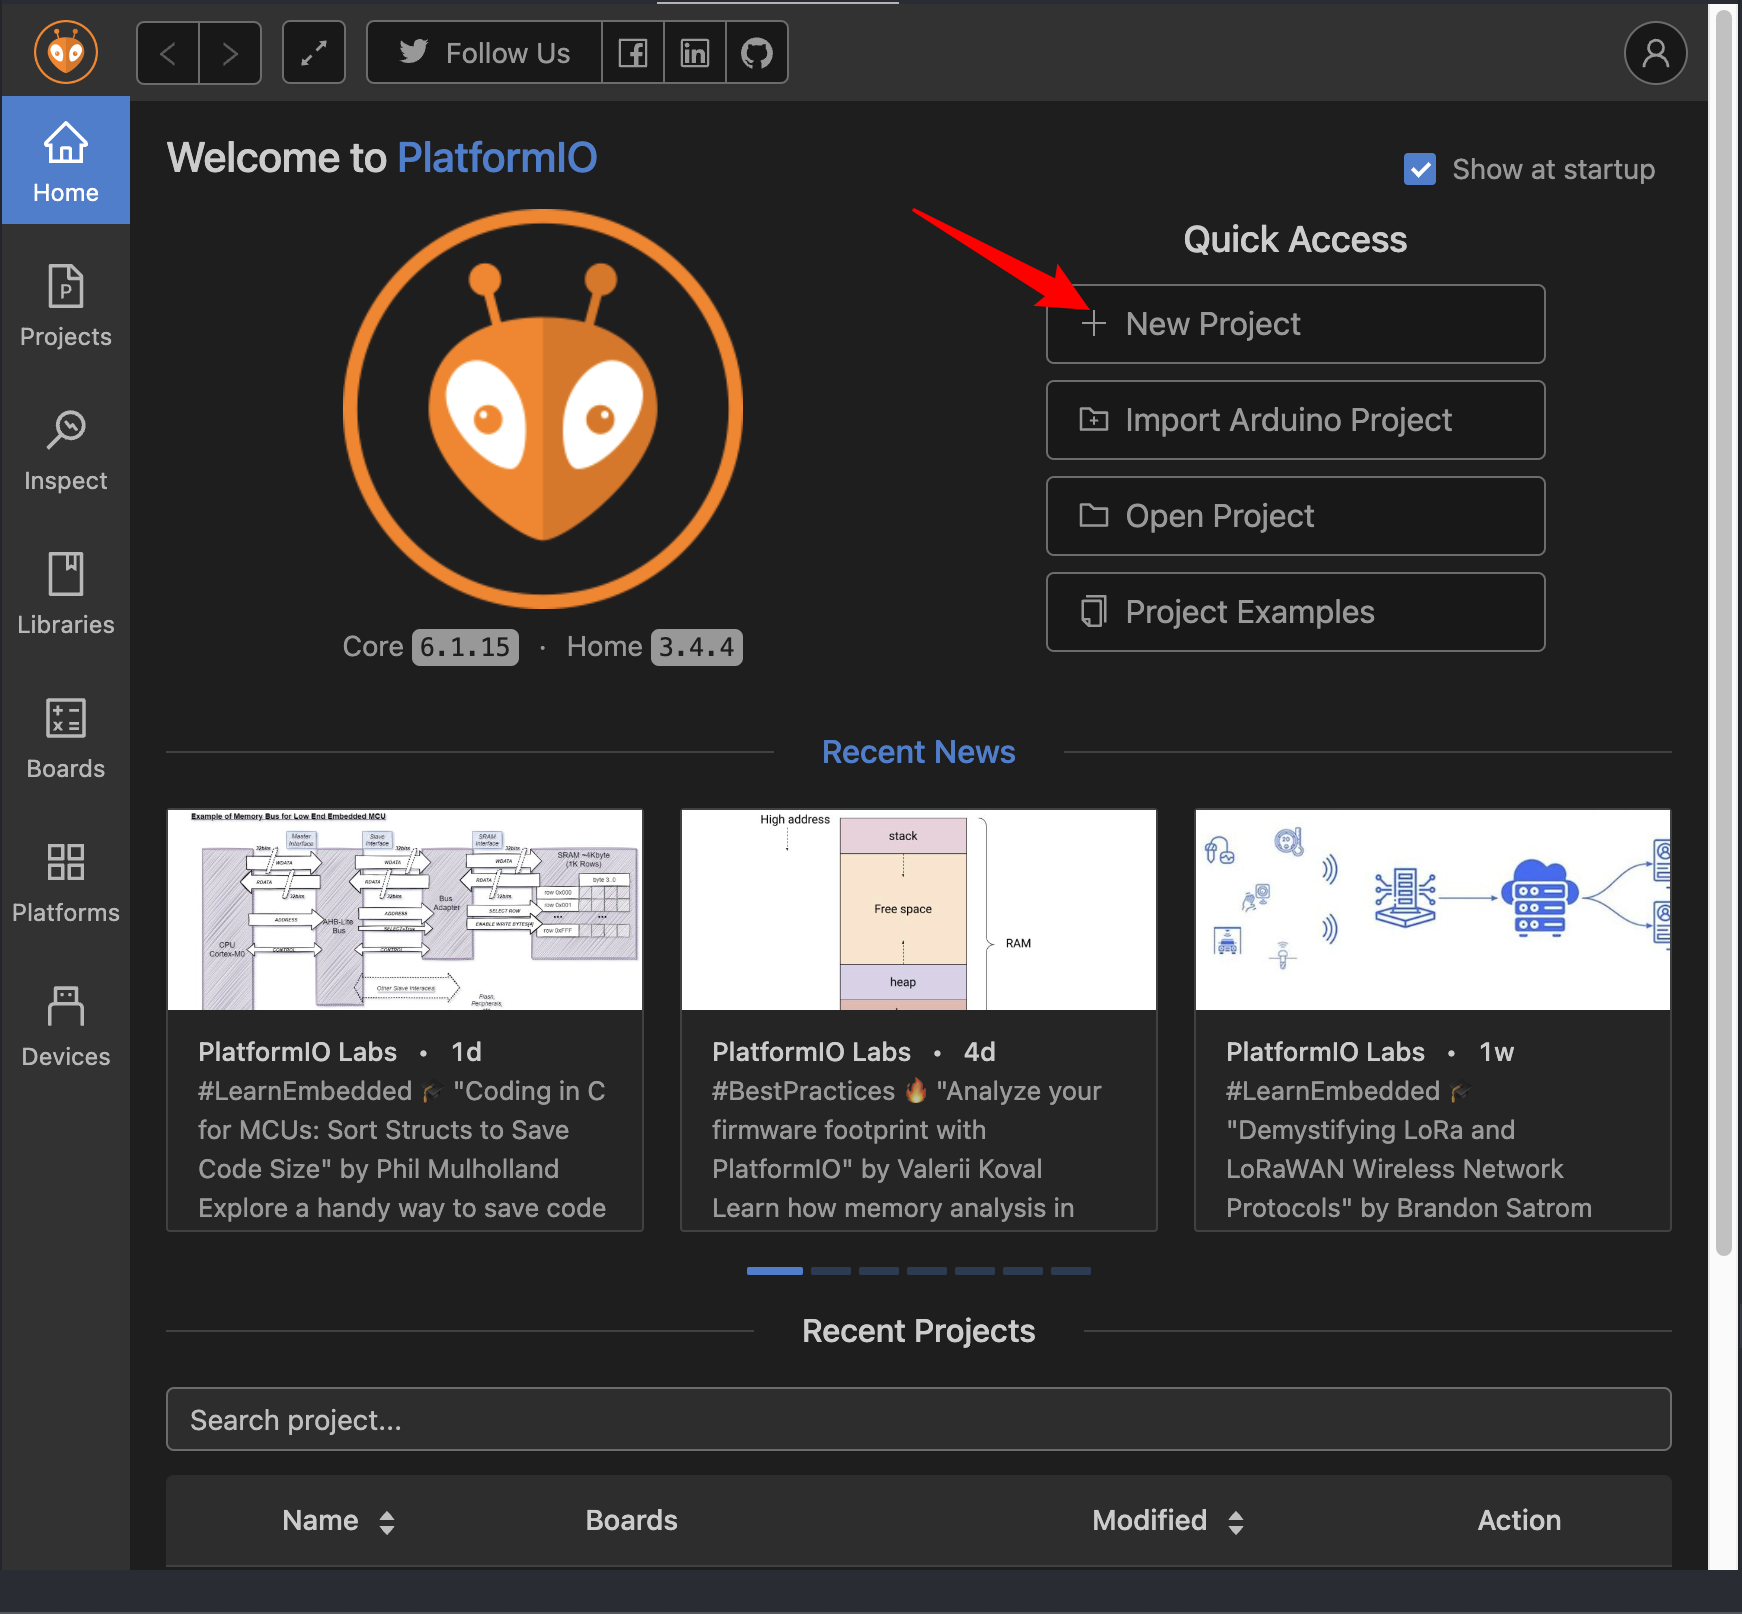
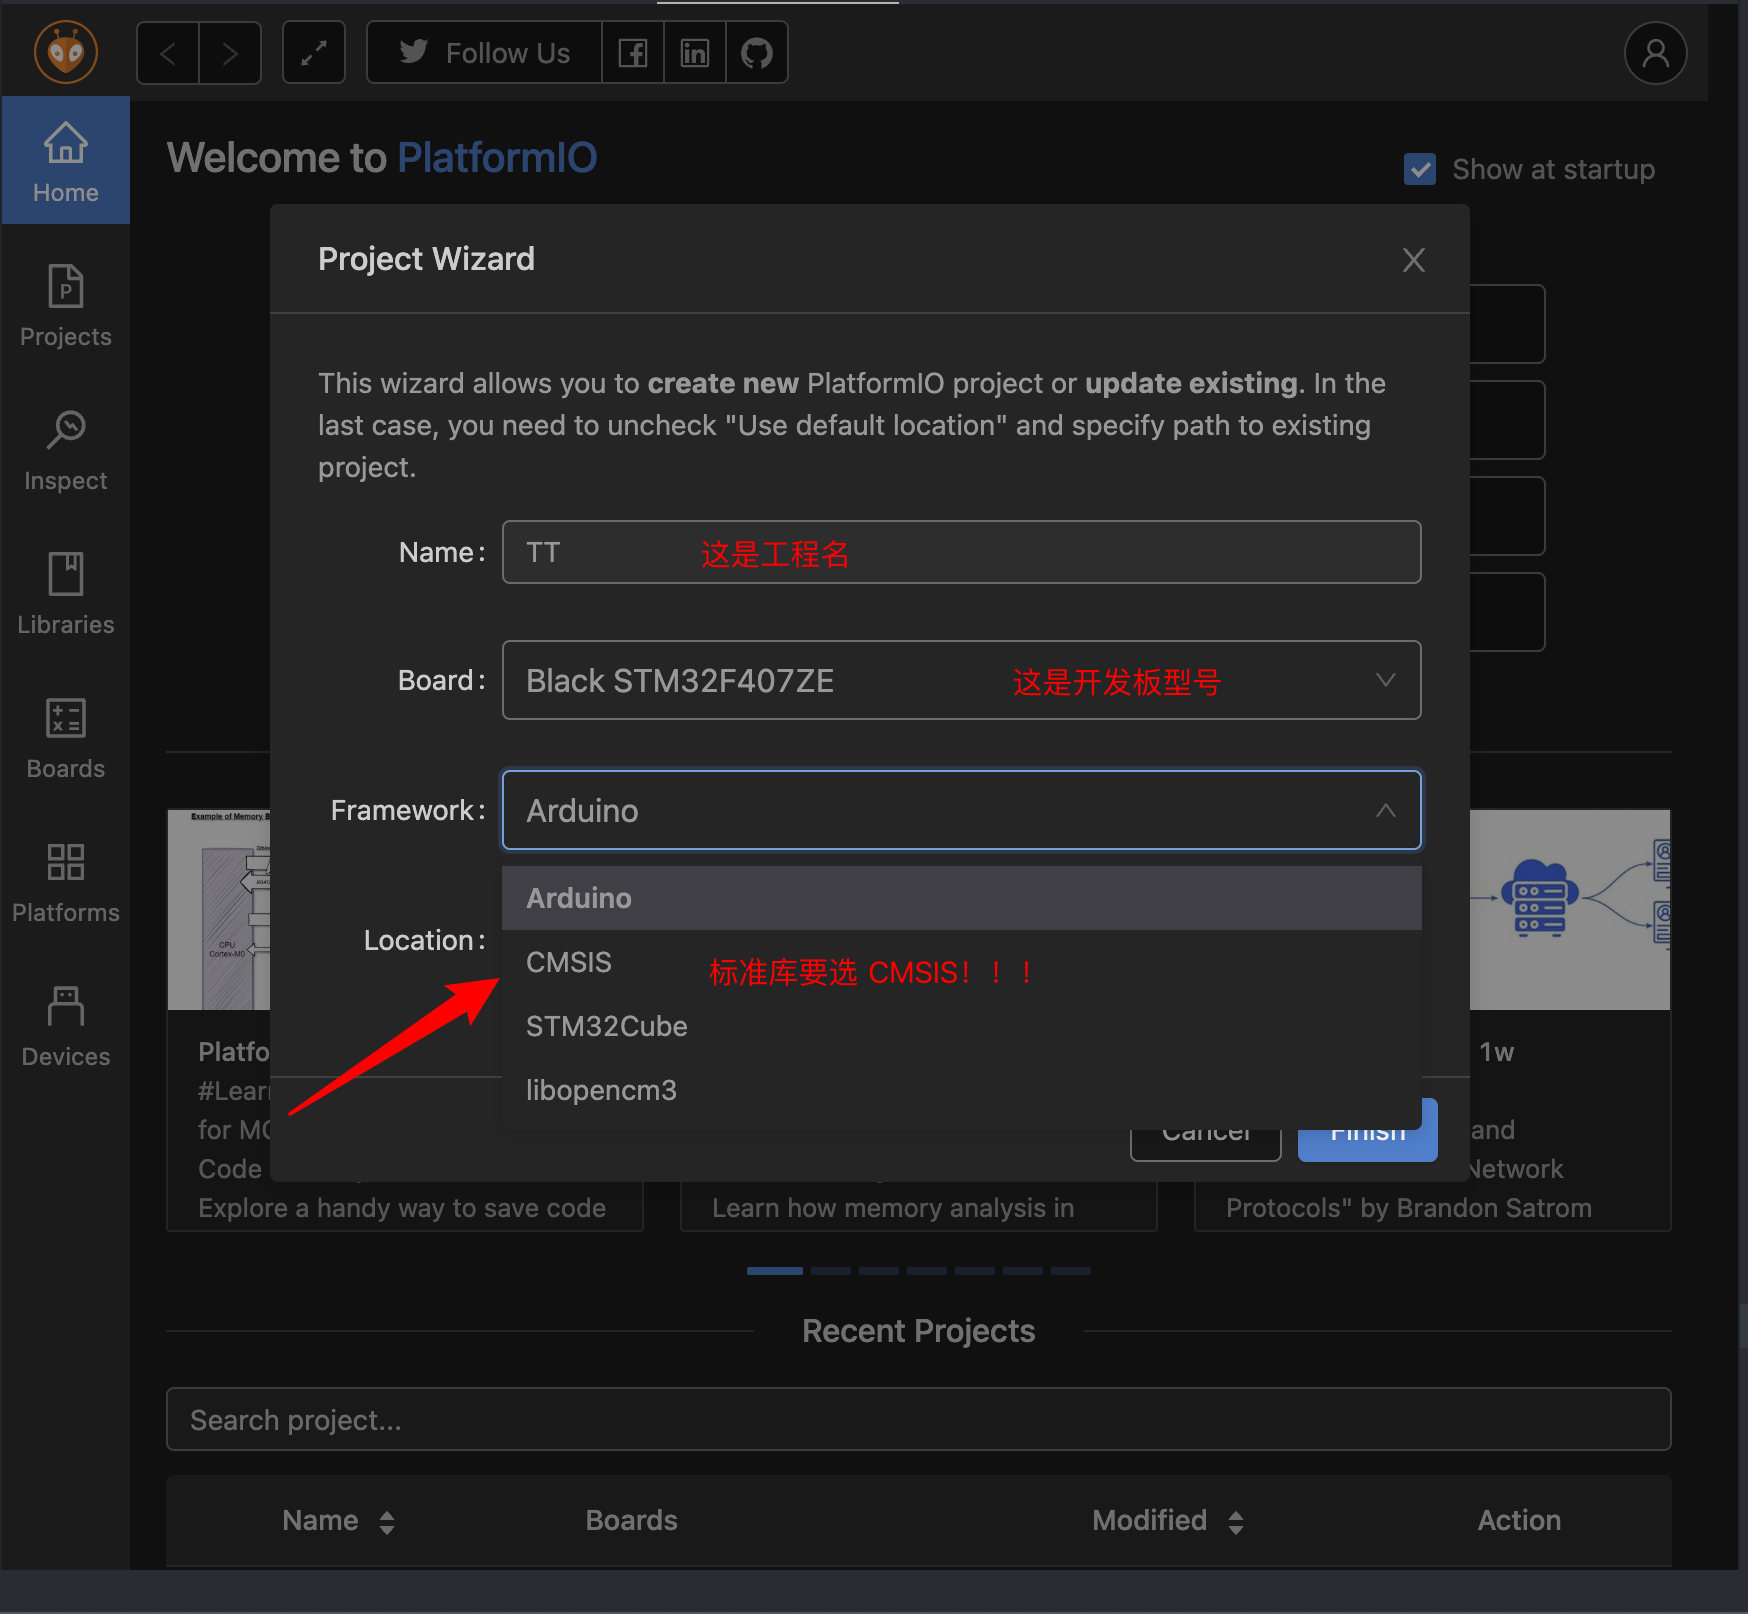
2.在 platformIO 新建一个 CMSIS 工程
工程建立成功之后,应该是下面这样:
TT
├── include
│   └── README
├── lib
│   └── README
├── platformio.ini
├── src
└── test
    └── README
3.导入标准库文件并配置工程
3.1导入标准库文件
1.解压从官网下载的标准外设库 en.stsw-stm32065_v1-9-0.zip ,获得一个 STM32F4xx_DSP_StdPeriph_Lib_V1.9.0 目录
2.在 platformIO 工程的 include 目录中新建一个 main.h:
#include "stm32f4xx.h"
包含头文件根据开发板型号而定。
3.打开 .../STM32F4xx_DSP_StdPeriph_Lib_V1.9.0/Libraries/CMSIS/Device/ST/STM32F4xx/Include ,将其中的 stm32f4xx.h 、system_stm32f4xx.h复制到 platform 工程的 include 目录下。
4.打开.../STM32F4xx_DSP_StdPeriph_Lib_V1.9.0/Project/STM32F4xx_StdPeriph_Templates,将其中的stm32f4xx_it.h、stm32f4xx_conf.h复制到 platform 工程的 include 目录下;将stm32f4xx_it.c复制到 platform 工程的 src 目录中。
5.将.../STM32F4xx_DSP_StdPeriph_Lib_V1.9.0/Libraries/STM32F4xx_StdPeriph_Driver整个目录复制到 platform 工程的 src 目录中。
最后,不出意外你会获得以下工程:
├── include
│   ├── README
│   ├── main.h
│   ├── stm32f4xx.h
│   ├── stm32f4xx_conf.h
│   ├── stm32f4xx_it.h
│   └── system_stm32f4xx.h
├── lib
│   └── README
├── platformio.ini
├── src
│   ├── STM32F4xx_StdPeriph_Driver
│   │   ├── inc
│   │   │   ├── .......
│   │   └── src
│   │       ├── .......
│   ├── main.c
│   └── stm32f4xx_it.c
└── test
    └── README
3.2配置 platform.ini
打开工程根目录下的 platform.ini 文件,初始版本应该是:
[env:black_f407ze]
platform = ststm32
board = black_f407ze
framework = cmsis
我们需要添加几项设置(有能力的可自行配置,小白照抄即可),所以最终版 ini 文件是:
; PlatformIO Project Configuration File
;
;   Build options: build flags, source filter
;   Upload options: custom upload port, speed and extra flags
;   Library options: dependencies, extra library storages
;   Advanced options: extra scripting
;
; Please visit documentation for the other options and examples
; https://docs.platformio.org/page/projectconf.html

[env:black_f407ze]
platform = ststm32
board = black_f407ze
framework = cmsis

; 这里配置调试方式是 jlink
upload_protocol = jlink

; 这里配置头文件搜索路径,后面的 —D 则是全局定义一些配置,具体可以在 stm32f4xx.h 查询,这里照抄即可,有能力的可以自行配置
build_flags =
    -Iinclude
    -Isrc/STM32F4xx_StdPeriph_Driver/inc
    -D USE_STDPERIPH_DRIVER
    -D STM32F40XX
4.问题解决
4.1常见问题
然后我们兴致勃勃地点击 编译 build ,不出意外,你会收到以下错误:
compiling stm32f4xx_fmc.c...
..\..\CodeFile\Bsp\stm32f4xx_fmc.c(144): error:  #20: identifier "FMC_Bank1" is undefined
      FMC_Bank1->BTCR[FMC_Bank] = 0x000030DB;
..\..\CodeFile\Bsp\stm32f4xx_fmc.c(149): error:  #20: identifier "FMC_Bank1" is undefined
      FMC_Bank1->BTCR[FMC_Bank] = 0x000030D2;
      tmpbwr = FMC_Bank1E->BWTR[FMC_NORSRAMInitStruct->FMC_Bank];
..\..\CodeFile\Bsp\stm32f4xx_fmc.c(256): error:  #20: identifier "FMC_BWTR1_ADDSET" is undefined
                             FMC_BWTR1_BUSTURN | FMC_BWTR1_ACCMOD));
..\..\CodeFile\Bsp\stm32f4xx_fmc.c(269): error:  #20: identifier "FMC_Bank1E" is undefined
      FMC_Bank1E->BWTR[FMC_NORSRAMInitStruct->FMC_Bank] = 0x0FFFFFFF;
..\..\CodeFile\Bsp\stm32f4xx_fmc.c(326): error:  #20: identifier "FMC_Bank1" is undefined
      FMC_Bank1->BTCR[FMC_Bank] &= BCR_MBKEN_RESET;
..\..\CodeFile\Bsp\stm32f4xx_fmc.c(394): error:  #20: identifier "FMC_Bank2" is undefined
      FMC_Bank2->PCR2 = 0x00000018;
..\..\CodeFile\Bsp\stm32f4xx_fmc.c: 0 warnings, 30 errors
compiling stm32f4xx_fsmc.c...
- 原因: stm32f4xx_fmc.c是固件库中的一个外设,仅作用于STM32F429_439xx、STM32F446xx、STM32F469_479xx、STM32F427_437xx系列的芯片,(本例中是使用的是 STM32F407ZE,不在该范围内,所以不需要引用这个文件)如果不是这些芯片的话将不会引用stm32f4xx_fmc.h这个头文件,也就产生了宏没有定义的问题。
- 解决方法:
将
TT/src/STM32F4xx_StdPeriph_Driver/src/stm32f4xx_fmc.c文件删除,然后依次点击 clean -> build
4.2不怎么常见的问题(未按本教程操作)
有些网络教程会让你把 system_stm32f4xx.c 也放到工程的 src 目录中,然后你就会遇到:
Verbose mode can be enabled via `-v, --verbose` option
CONFIGURATION: https://docs.platformio.org/page/boards/ststm32/genericSTM32F103ZE.html
PLATFORM: ST STM32 (8.1.0) > STM32F103ZE (64k RAM. 512k Flash)
HARDWARE: STM32F103ZET6 72MHz, 64KB RAM, 512KB Flash
DEBUG: Current (jlink) External (blackmagic, jlink, stlink)
PACKAGES:
 - framework-cmsis 2.50501.200527 (5.5.1)
 - framework-cmsis-stm32f1 4.3.1
 - tool-ldscripts-ststm32 0.1.0
 - toolchain-gccarmnoneeabi 1.70201.0 (7.2.1)
LDF: Library Dependency Finder -> http://bit.ly/configure-pio-ldf
LDF Modes: Finder ~ chain, Compatibility ~ soft
Found 0 compatible libraries
Scanning dependencies...
No dependencies
Building in debug mode
...
Compiling .pio/build/genericSTM32F103ZE/FrameworkCMSIS/gcc/startup_stm32f103xe.o
Compiling .pio/build/genericSTM32F103ZE/src/STM32F10x_FWLib/src/stm32f10x_usart.o
Compiling .pio/build/genericSTM32F103ZE/src/STM32F10x_FWLib/src/stm32f10x_wwdg.o
Compiling .pio/build/genericSTM32F103ZE/src/SYSTEM/delay/delay.o
Compiling .pio/build/genericSTM32F103ZE/src/SYSTEM/sys/sys.o
Compiling .pio/build/genericSTM32F103ZE/src/SYSTEM/usart/usart.o
Compiling .pio/build/genericSTM32F103ZE/src/main.o
Compiling .pio/build/genericSTM32F103ZE/src/stm32f10x_it.o
Compiling .pio/build/genericSTM32F103ZE/src/system_stm32f10x.o
...
src/SYSTEM/usart/usart.c:38:0: warning: ignoring #pragma import  [-Wunknown-pragmas]
 #pragma import(__use_no_semihosting)

Linking .pio/build/genericSTM32F103ZE/firmware.elf
.pio/build/genericSTM32F103ZE/src/system_stm32f10x.o: In function `SystemInit':
/media/XXX/LINUX2/CLionProjects/untitled2/src/system_stm32f10x.c:213: multiple definition of `SystemInit'
.pio/build/genericSTM32F103ZE/FrameworkCMSIS/system_stm32f1xx.o:/home/XXX/.platformio/packages/framework-cmsis-stm32f1/Source/Templates/system_stm32f1xx.c:161: first defined here
.pio/build/genericSTM32F103ZE/src/system_stm32f10x.o: In function `SystemCoreClockUpdate':
/media/XXX/LINUX2/CLionProjects/untitled2/src/system_stm32f10x.c:319: multiple definition of `SystemCoreClockUpdate'
.pio/build/genericSTM32F103ZE/FrameworkCMSIS/system_stm32f1xx.o:/home/XXX/.platformio/packages/framework-cmsis-stm32f1/Source/Templates/system_stm32f1xx.c:260: first defined here
.pio/build/genericSTM32F103ZE/src/system_stm32f10x.o:/media/XXX/LINUX2/CLionProjects/untitled2/src/system_stm32f10x.c:167: multiple definition of `AHBPrescTable'
.pio/build/genericSTM32F103ZE/FrameworkCMSIS/system_stm32f1xx.o:(.rodata.AHBPrescTable+0x0): first defined here
.pio/build/genericSTM32F103ZE/src/system_stm32f10x.o:(.data.SystemCoreClock+0x0): multiple definition of `SystemCoreClock'
.pio/build/genericSTM32F103ZE/FrameworkCMSIS/system_stm32f1xx.o:(.data.SystemCoreClock+0x0): first defined here


# 不知道错了什么
collect2: error: ld returned 1 exit status
*** [.pio/build/genericSTM32F103ZE/firmware.elf] Error 1
 [FAILED] Took 2.61 seconds
make[3]: *** [CMakeFiles/Debug.dir/build.make:77:CMakeFiles/Debug] 错误 1
make[2]: *** [CMakeFiles/Makefile2:127:CMakeFiles/Debug.dir/all] 错误 2
make[1]: *** [CMakeFiles/Makefile2:134:CMakeFiles/Debug.dir/rule] 错误 2
make: *** [Makefile:151:Debug] 错误 2
- 解决方法: 把该文件删除,之后 clean -> bulid
5.程序烧录
以STM32芯片程序烧写为例,最基础的方法是通过串口烧写,目前大部分烧写工具都是通过串口连接后使用.hex文件烧写,由于PlatformIO编译默认生成的是.bin和.elf文件,如果我们需要用hex文件通过其他烧写工具烧写的话需要使用一个python脚本将.elf文件转换为.hex文件。
当然PlatformIO本身也支持串口烧写,所以我们一个一个来讲。
5.1生成 hex 文件
我们在项目的根目录下(和platformio.ini文件同级)新建一个export_hex.py,内容如下:
Import("env")

# # Custom HEX from ELF

env.AddPostAction(

    "$BUILD_DIR/${PROGNAME}.elf",

    env.VerboseAction(" ".join([

        "$OBJCOPY", "-O", "ihex", "-R", ".eeprom",

        '"$BUILD_DIR/${PROGNAME}.elf"', '"$BUILD_DIR/${PROGNAME}.hex"'  # 加个单引号

    ]), "Building $BUILD_DIR/${PROGNAME}.hex")

)
然后在platformio.ini文件里添加一行extra_scripts = export_hex.py,使其在每次编译后运行一遍这个脚本。
至此,重新编译后,就会在.pio/build/<你的嵌入式芯片型号>/目录下多生成一个firmware.hex程序,然后打开其他烧写程序工具,选择这个程序就可以成功烧写了。
5.2 PlatformIO程序烧写
platformIO在有串口接入的情况下默认使用的是串口烧写程序,但是出于严谨和方便维护的情况下,严格的配置方式是在platformio.ini文件中配置烧写方式为串口(upload_protocol = serial)。
点击编译按钮隔壁的”Upload”按钮,platformIO就会开始自动寻找对应的COM口,并自动烧写。
以STM32为例,platformIO使用的是它下载下来的stm32flash工具烧写的,如果需要自定义的话,可以将upload_protocol设为custom,并自定义烧写命令。
至此,实现串口烧写程序。

